zoomcamp_course_project_dlt
dlt with Redshift & FastAPI
The project was prepared as a part of the Data Engineering Zoomcamp, a free nine-week course that covers the fundamentals of data engineering.
- As a part of this project, transactional data was served via a FastAPI REST endpoint;
- dlt, a framework for building HTTP-based service APIs in Python, was used to store the data in AWS S3—a cloud storage service from AWS—as a data lake, and in Redshift, a data warehouse service from AWS;
- Transformations were applied directly in Redshift;
- Clean data was visualized with Redshift QuickSight, a visualization tool from AWS.
The transaction dataset used for the project was downloaded from Kaggle and stored in AWS S3, with FastAPI reading from the bucket. The schema of the dataset is as follows:
- UserId, a unique ID for all User Id
- TransactionId, a unique Transactions ID
- TransactionTime, a transaction Time
- ItemCode, an item code that item will be purchased
- ItemDescription, an item description
- NumberOfItemPurchased, a total number of items Purchased
- CostPerltem, cost per item Purchased
- Country, a country where item purchased
Table of Contents
- Local Environment Setup
- FastAPI Setup
- AWS S3 and AWS Redshift Setup
- Configuring dlt
- Data Transformation in Redshift
- Deployment and Monitoring
- Visualization
Local Environment Setup
Since the project relies on several Python libraries, you might want to set up a dedicated virtual environment using conda and install the required Python libraries.
conda create -n datapipeline
conda activate datapipeline
pip install fastapi[standard]
pip install dlt
pip install "dlt[redshift]"
pip install "dlt[cli]"
pip install "dlt[s3]"
pip install "dlt[filesystem]
FastAPI Setup
To launch the FastAPI server, you would create a Python file (for example, main.py) that references the dataset stored on your system. In my case, the script to retrieve data from the local environment was as follows:
from fastapi import FastAPI, HTTPException, Query
import pandas as pd

app = FastAPI()

# Load CSV and handle NaN values for JSON compatibility
df = pd.read_csv("D:/OneDrive/Documents/zoomcamp/transaction_data.csv")
df = df.where(pd.notnull(df), None)

@app.get("/transaction_details") #type of the http request
def get_data(
    page: int = Query(1, ge=1, description="Page number (starting at 1)"),
    page_size: int = Query(100, ge=1, le=10, description="Number of items per page") #num of items from 1 to 1000
):
    total = len(df)
    start = (page - 1) * page_size
    end = start + page_size
    if start >= total:
        raise HTTPException(status_code=404, detail="No data found") #loops throughout the pages and throws the error if the data is not found
    page_data = df.iloc[start:end].to_dict(orient="records") #return .json objects
    return {
        "page": page,
        "page_size": page_size,
        "total": total,
        "data": page_data
    }
To launch the FastAPI server in the development mode, run fastapi dev main.py, and then, visit Server for testing. For example, to see the first 100 records, I entered test link. The best part in FastAPI, though, is that FastAPI also automatically generates interactive API documentation using Swagger UI and Redoc that can be accessed via documentation.
AWS S3 and AWS Redshift Setup
Redshift Setup:
You can either use an existing Redshift cluster or create a new one via the AWS console - read more at aws site. Let’s assume that you are creating the cluster from scratch. Navigate to Redshift » Provisioned Cluster Dashboard’ » Create Cluster where you would be prompted to specify ‘Cluster Identifier’, ‘Node Type’, ‘Admin User Name’, ‘Admin Password’, ‘Database Name’, and other params. For simplicity, I configured the data warehouse to be publicly accessible, not recommended in the production mode.
S3 Setup
- You can follow the AWS documentation at aws site to create a new bucket (or use an existing one) to be later used as a staging area.
- Create an IAM user and attach the recommended policies, described by the dlt team at dlt site.
Configuring dlt
Before I dive into the code, let me summarize the dlt framework. dlt is an open source data integration library used to extract data from different sources, e.g. REST APIs, databases, etc. and load it into data lakes, data warehouses or send back to applications.
The main building blocks of the dlt framework:
@dlt.sources is used to define connections to data sources and pull data into your pipeline.
@dlt.resources is used to produce tables from the data extracted.
@dlt.transformer is used to define transformations to clean, normalize, or enrich your data.
pipelines are used to “stitch” together different steps, such as data extraction; data normalization or flattening and standardizing data structures; and loading the processed data into the destination.
-
Since I planned to extract data from a REST API and load it to Redshift, I run
dlt init rest_api redshiftto initialize a new project and generate a templated script, serving as the foundation for building a dlt pipeline. Read more at dlt site. -
During the previous stage, I set up AWS credentials to connect to the S3 bucket and added them to a
.dlt/secrets.tomlfile - the file is excluded from version control:
[destination.redshift.credentials]
database = "your_database_name"
password = "your_redshift_password"
username = "your_redshift_username"
host = "your_redshift_cluster_endpoint"
port = 5439
connect_timeout = 15

[destination.filesystem]
bucket_url = "s3://your_bucket_name"

[destination.filesystem.credentials]
aws_access_key_id = "your_aws_access_key"
aws_secret_access_key = "your_aws_secret_key"
The templated Python file provided by dlt was adapted as follows:
from typing import Any
import os
import dlt
import requests
from dlt.common.pendulum import pendulum
from dlt.sources.rest_api import RESTAPIConfig, rest_api_resources

@dlt.source(name="custom")
def custom_source() -> Any:
    """Configurations for the pipeline"""
    config: RESTAPIConfig = {
        "client": {
            "base_url": "http://localhost:8000",  #render's API
        },
        "resource_defaults": {
            "endpoint": {
                "params": {
                    "page": 1,
                    "page_size": 1000,
                },
            },
        },
        "resources": [
            {
                "name": "transaction_details",
                "endpoint": "transaction_details",
            },
        ],
    }
    yield from rest_api_resources(config)


def run_redshift_pipeline() -> None:
    """Creading the pipeline"""
    pipeline = dlt.pipeline(
        pipeline_name="redshift_pipeline",
        destination="redshift",
        staging="filesystem",  #dumping the data prior to storing in redshift
        dataset_name="transaction_details_data"
    )
    load_info = pipeline.run(custom_source())
    print("Redshift pipeline load info:", load_info)

def run_s3_pipeline() -> None:
    """Storing data in s3"""
    pipeline = dlt.pipeline(
        pipeline_name="s3_pipeline",
        destination="filesystem",
        dataset_name="s3_transaction_details"
    )
    load_info = pipeline.run(custom_source())
    print("Filesystem pipeline load info:", load_info)

if __name__ == "__main__":
    run_redshift_pipeline()
    run_s3_pipeline()
Data Transformation in Redshift
Once I confirmed that the data was loaded, I created an SQL view to transform and clean the dataset. The original transaction_time column was in the format ‘Wed Dec 26 09:06:00 IST 2018’. In addition, the columns for number_of_items_purchased and cost_per_item were stored as varchar, making arithmetic operations in Redshift inconvenient.
CREATE VIEW transaction_details_cleaned AS
SELECT
    user_id,
    transaction_id,
    item_code,
    item_description,
    CAST(number_of_items_purchased AS NUMERIC) AS number_of_items_purchased,
    CAST(cost_per_item AS NUMERIC) AS cost_per_item,
    country,
  to_char(
    to_timestamp(
      trim(replace(substring(transaction_time, 5), 'IST', '')),
      'Mon DD HH24:MI:SS YYYY'
    ),
    'YYYY-MM-DD HH24:MI:SS'
  ) AS transaction_timestamp,
    _dlt_load_id,
    _dlt_id
FROM "zoomcamp"."transaction_details_data"."transaction_details";
Deployment and Monitoring
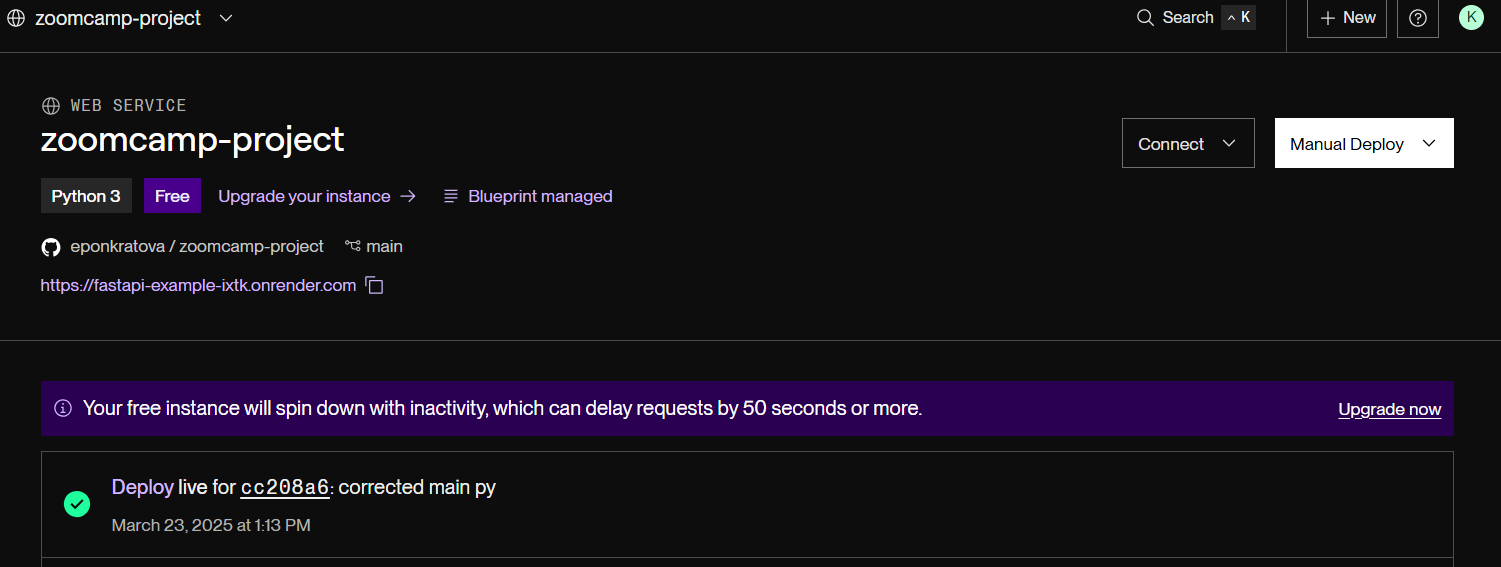
- To deploy my FastAPI app, I chose Render, a cloud hosting service, by uploading the main.py file to another Github repositry - github and creating a web service. Render is a modern cloud platform that simplifies the process of deploying and scaling web applications, offering continuous deployment. The setup process is extremelly quick, providing that you added your env variables to the Render’s env - which I didn’t do initially, correctly specifying buckets and folders - which I didn’t do, adjusting the script to load the file uploaded to S3 - which I didn’t do either. Read more at render.
- The dlt team already did the heavy lifting by detailing the deployment of dlt pipelines with GitHub Actions at github. It’s as simple as running
dlt deploy {yourpipline}.py github-action --schedule "*/30 * * * *".
To view your generated.yml file, open your repository » Actions. I did notice, however, that the environment variables were not created automatically, so I added the following secrets manually by going to GitHub repo » Settings » Secrets:
- REDSHIFT_DB
- REDSHIFT_USER
- REDSHIFT_HOST
- REDSHIFT_PORT
- REDSHIFT_PASSWORD
- AWS_BUCKET_URL
- AWS_SECRET_ACCESS_KEY
- AWS_ACCESS_KEY_ID
name: Run redshift_pipeline pipeline from rest_api_pipeline.py
on:
  schedule:
    - cron: '*/30 * * * *'
  workflow_dispatch: {}

env:
  DESTINATION__REDSHIFT__CREDENTIALS__DATABASE: "$"
  DESTINATION__REDSHIFT__CREDENTIALS__USERNAME: "$"
  DESTINATION__REDSHIFT__CREDENTIALS__HOST: "$"
  DESTINATION__REDSHIFT__CREDENTIALS__PORT: "$"
  DESTINATION__REDSHIFT__CREDENTIALS__CONNECT_TIMEOUT: "15"
  DESTINATION__REDSHIFT__CREDENTIALS__PASSWORD: "$"

  REDSHIFT_PIPELINE__DESTINATION__FILESYSTEM__BUCKET_URL: "$"
  REDSHIFT_PIPELINE__BUCKET_URL: "$"
  REDSHIFT_PIPELINE__DESTINATION__BUCKET_URL: "$"
  DESTINATION__FILESYSTEM__BUCKET_URL: "$"
  DESTINATION__BUCKET_URL: "$"
  BUCKET_URL: "$"

  REDSHIFT_PIPELINE__DESTINATION__CREDENTIALS__AWS_SECRET_ACCESS_KEY: "$"
  REDSHIFT_PIPELINE__CREDENTIALS__AWS_SECRET_ACCESS_KEY: "$"
  DESTINATION__FILESYSTEM__CREDENTIALS__AWS_SECRET_ACCESS_KEY: "$"
  DESTINATION__CREDENTIALS__AWS_SECRET_ACCESS_KEY: "$"
  CREDENTIALS__AWS_SECRET_ACCESS_KEY: "$"

  REDSHIFT_PIPELINE__DESTINATION__FILESYSTEM__CREDENTIALS__AWS_ACCESS_KEY_ID: "$"
  REDSHIFT_PIPELINE__DESTINATION__CREDENTIALS__AWS_ACCESS_KEY_ID: "$"
  REDSHIFT_PIPELINE__CREDENTIALS__AWS_ACCESS_KEY_ID: "$"
  DESTINATION__FILESYSTEM__CREDENTIALS__AWS_ACCESS_KEY_ID: "$"
  DESTINATION__CREDENTIALS__AWS_ACCESS_KEY_ID: "$"
  CREDENTIALS__AWS_ACCESS_KEY_ID: "$"
  AWS_ACCESS_KEY_ID: "$"
  AWS_SECRET_ACCESS_KEY: "$"

jobs:
  maybe_skip:
    runs-on: ubuntu-latest
    outputs:
      should_skip: $
    steps:
      - id: skip_check
        uses: fkirc/skip-duplicate-actions@v5
        with:
          concurrent_skipping: always
          skip_after_successful_duplicate: "false"
          do_not_skip: "[]"
  run_pipeline:
    needs: maybe_skip
    if: needs.maybe_skip.outputs.should_skip != "true"
    runs-on: ubuntu-latest
    steps:
      - name: Check out
        uses: actions/checkout@v3
      - name: Setup Python
        uses: actions/setup-python@v4
        with:
          python-version: 3.10.x
      - name: Restore virtualenv
        uses: syphar/restore-virtualenv@v1
        id: cache-virtualenv
        with:
          requirement_files: requirements_github_action.txt
      - name: Restore pip download cache
        uses: syphar/restore-pip-download-cache@v1
        if: steps.cache-virtualenv.outputs.cache-hit != "true"
      - name: Install dependencies
        run: pip install -r requirements_github_action.txt
        if: steps.cache-virtualenv.outputs.cache-hit != "true"
      - name: Run pipeline script
        run: python "rest_api_pipeline.py"
And whola! The workflow can be triggered manually or run automatically on a defined schedule.
Visualization
Now as I have the clean dataset, I was able to connect Amazon QuickSight to visualize it by specifying the Redshift cluster details.